Freeradius is most widely used radius server around the world. I am going to write down some basic steps to install and test Freeradius in this post.


Install RedHat Enterprise Linux 5 with default packages. I am using RHEL5 update4. If you want to use mysql with freeradius install mysql, mysql-server, mysql-devel, perl-DBI, perl-DBD, packages before installing freeradius.

freeradius is distributed in RHEL/CentOS as RPM package. freeradius-1.1.3-1.4.el5.i386.rpm is the package included in RHEL5. To obtain latest free radius package go to http://freeradius.org/download.html and download latest tar.gz package which is freeradius-server-2.1.12.tar.
Logon to RHEL5 with root and open terminal. To check the IP address for your machine type the following command.
[root@localhost ~]# ifconfig
This will tell your the network parameters for your RHEL machine. as shown in following image.

Now we will use SSH secure shell client to do the rest. Make sure the firewall is off or if on then SSH is enabled. As you can see the IP Address is 192.168.0.198. We well now open SSH client from any other machine on the network and click file > Quick Connect. Type the IP Address in Host Name and root in User Name box. Port number is already mentioned which is 22 for SSH.

Click on connect and this will ask you for the password for user root.

Click OK and you are in the terminal of your RHEL machine. Now upload your freeradius-server-2.1.12.tar to RHEL machine. I am going to put it in the /home/araza directory. Open File transfer windows of SSH client and in left pan select your source directory and in right pan the destination directory. Right click the file from source pan and click upload.

Now move back to terminal window and go to directory when we just copied the freeradius file with the help of following commands.
[root@localhost ~]# cd /home/araza
Type ls to list the files in /araza directory
[root@localhost araza]# ls
freeradius-server-2.1.12.tar.gz
Now we have to unzip the freeradius-server-2.1.12.tar file.
[root@localhost araza]# tar -xzvf freeradius-server-2.1.12.tar.gz
type ls command again
[root@localhost araza]# ls
freeradius-server-2.1.12 freeradius-server-2.1.12.tar.gz
Now You can see we also have one directory along with the freeradius file. move into the freeradius-serverr-2.1.12 directory and type ls to list the unzipped files.

Now we can see some extracted files from freeradius-server-2.1.12.tar package. Run following three commands one by one. This will take some time to complete the process of these commands.
# ./configure
# make
# make install
This is the default installation. All files will be located in /usr/local/etc/raddb

This default configuration almost provide every authentication. Do not edit the configuration files until you know what to do. The first step to start the freeradius server in debug mode as user root.
# radiusd -X

To stop the freeradius press Ctrl+c.
Now we have to test the radiusserver. We can test freeradius installation via radtest utility. first of all start your radiuserver in debug mode in a terminal window.
# radiusd -X
Now open a new termial window. In this case lets test user with "user" and password with "password" on localhost (127.0.0.1) with secret "testing123"
# radtest user password 127.0.0.1 0 testing123

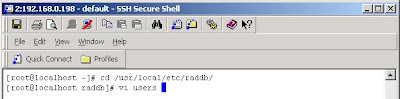
You can the Access-Reject Message. Do not worry about it. It is a normale message because the user "user" does not exist. lets create a new user by editing users file in /usr/local/etc/raddb

araza Cleartext-Password := "araza"
Move the cursor at the start of the line and press i to insert in the file. Type above line at the top of users file.
press escape key > then press shift+: and type wq > press enter to write and quit the file.

The user has been created. To apply settings we need to restart the radius server. to kill the process of radius server type following command.
# pkill radiusd
Start Radius server again.
# radiusd -X
Test the freeradius installation via radtest utility again by using user "araza" password "araza" on localhost "127.0.0.1" using secret "testing123" in the other terminal window.

Now you can see the Access-Accept message because user "araza" exist. :)
In case you face any problem in testing freeradius, always start it in debug mode and test it from other terminal window. You will have more details on radius debug mode terminal window to find out the problem.
That's all for now. I will write some more basic configurations in next part.
Good Luck.
No comments:
Post a Comment